KnowBe4 DKIM Setup
DKIM (DomainKeys Identified Mail) is an authentication protocol that uses cryptographic signatures to ensure that email messages are not tampered with during transit and truly originate from your domain.
This guide outlines how to configure DKIM for KnowBe4, a leading security awareness training and simulated phishing platform.
KnowBe4 DKIM Requirements
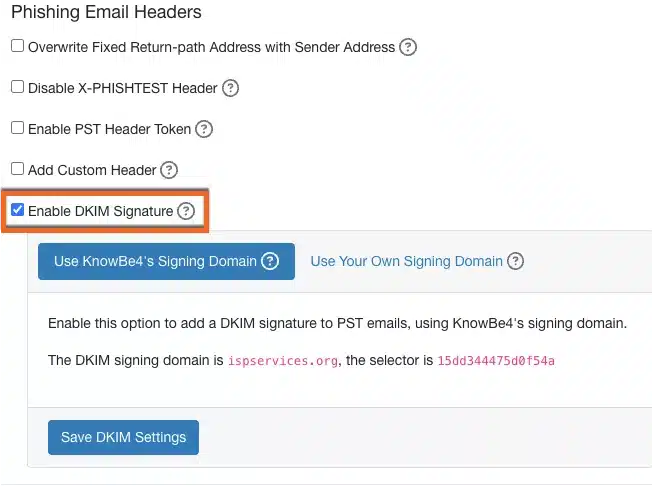
By default, all KnowBe4 training emails contain a DKIM signature, but phishing emails require the account owner to enable this feature first. See below for steps on how to enable DKIM signatures for phishing emails.
- Log in to your KnowBe4 account.
- Click on your email in the top-right corner and click Account Settings.
- Under the Phishing Settings section, select the Enable DKIM Signature check box.

- Click Save Changes at the bottom of your Account Settings page.
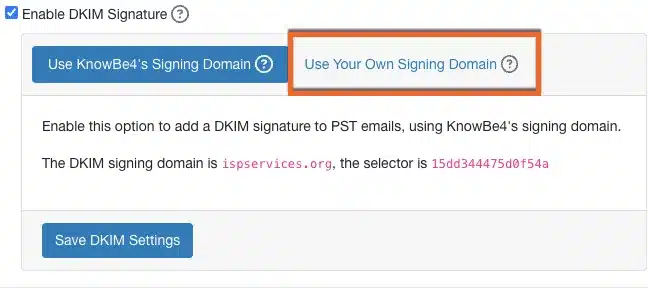
After enabling DKIM signatures, your organization can adjust the signing domain for your organization’s needs. To use your own signing domain for phishing emails, follow the steps below:
- Log in to your KnowBe4 account.
- Click your email in the top-right corner of the page and select Account Settings.
- Under the Phishing Settings section, select the Enable DKIM signature check box if you haven’t enabled DKIM signatures already.
- Click Use Your Own Signing Domain.

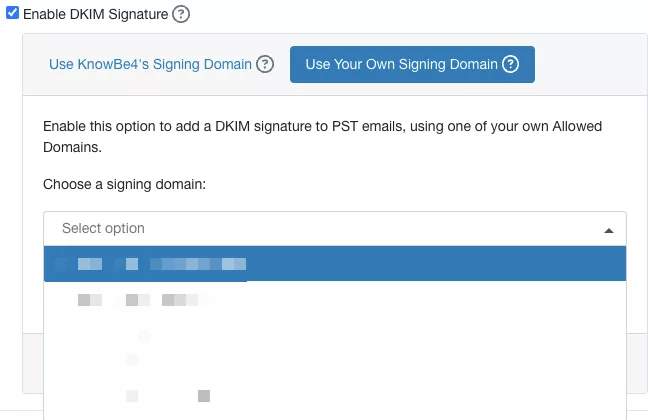
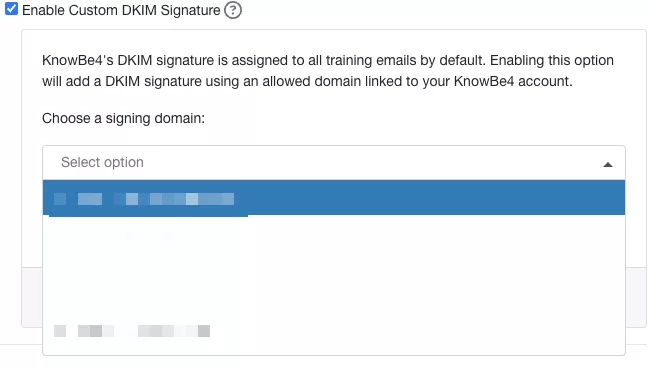
- Choose the domain you want to use. To add a domain to this drop-down menu, you will first need to add an allowed domain in your KnowBe4 account.

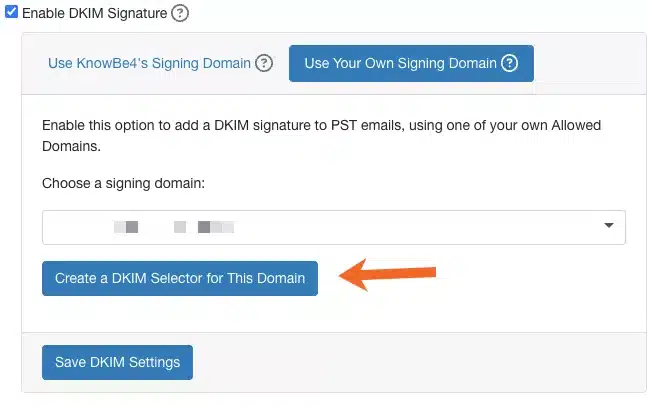
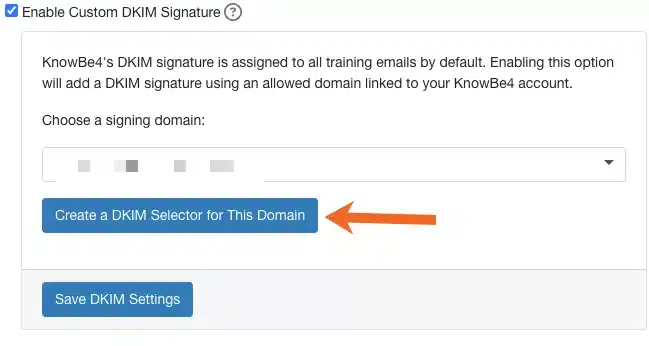
- Click Create a DKIM Selector for This Domain.

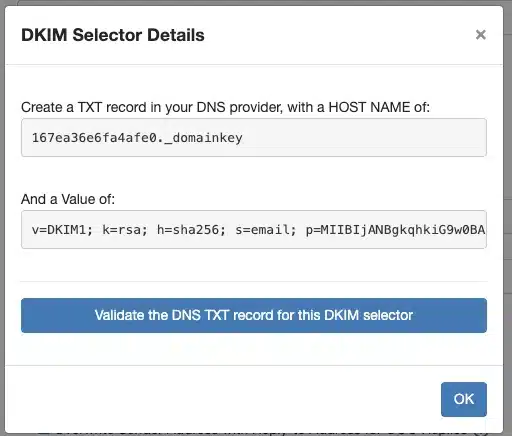
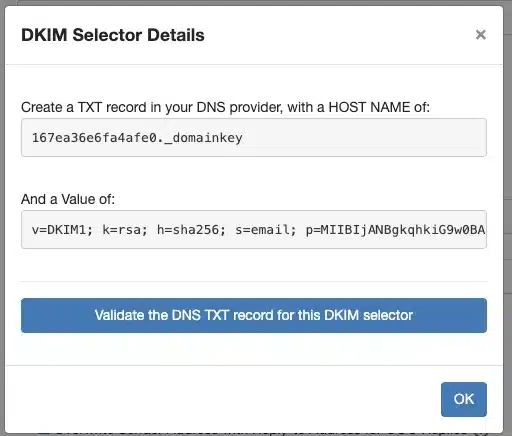
- Copy the host name and values provided in the fields of the pop-up window.

- Navigate to your DNS provider and add a TXT record containing the copied information. If you’re using Sendmarc for DKIM managment, you can add the keys directly to the platform by completing this process.
Note: To verify that your DNS provider has recognized the TXT record, click the Validate the DNS TXT record for this DKIM selector button.
- Click Save Changes at the bottom of your Account Settings page.
- Once you’ve created the TXT record in your DNS provider or added them to Sendmarc, click OK in the DKIM Selectors Details window in your KSAT console.
Using Custom DKIM Signatures in KnowBe4 Training Emails
You can also use custom DKIM signatures for your training emails. To use your own signing domain in training emails, follow the steps below:
- Log in to your KnowBe4 account.
- Click your email in the top-right corner of the page and select Account Settings.
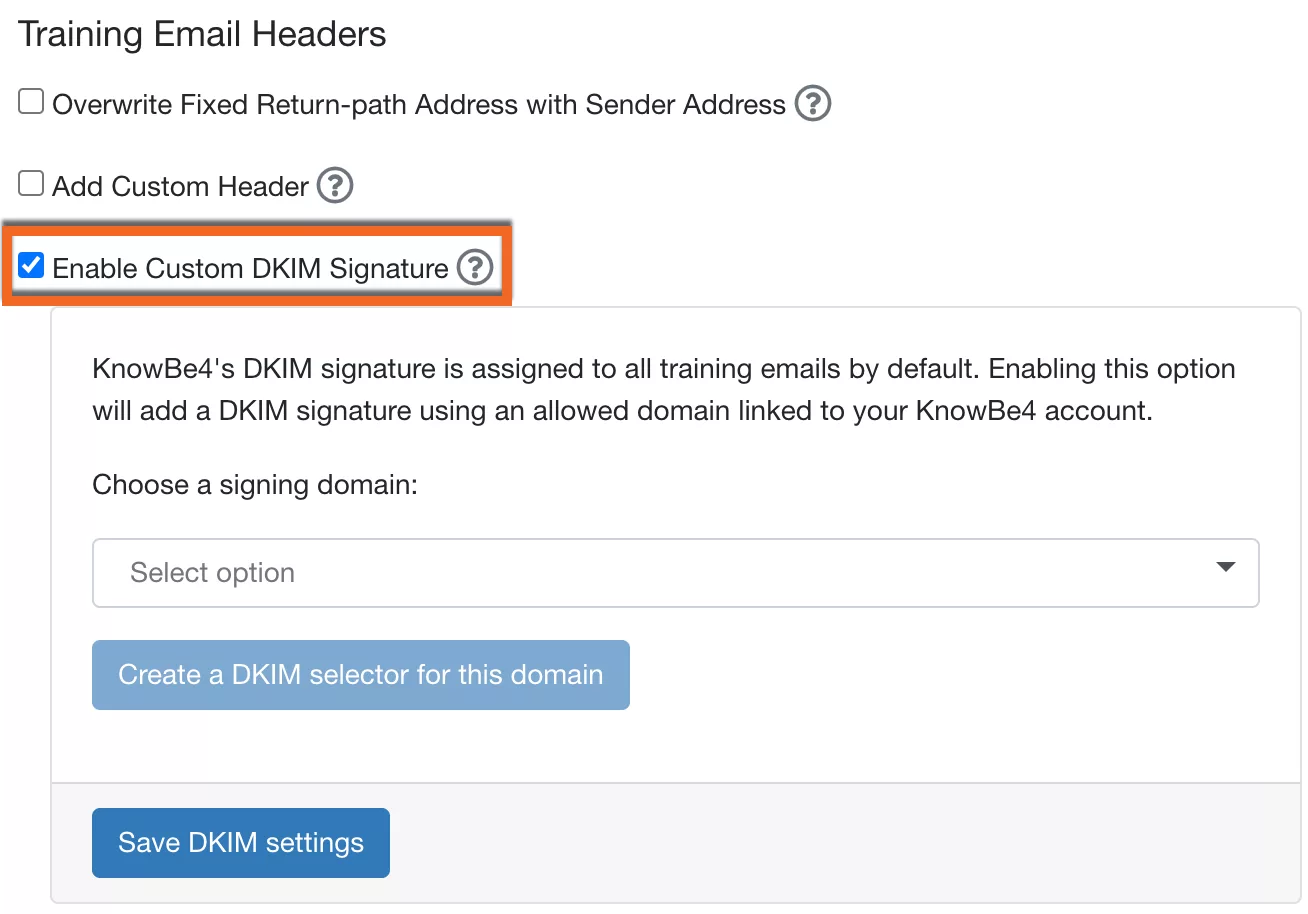
- Under the Training Settings section, select the Enable Custom DKIM Signature check box if you haven’t enabled DKIM signatures already.

- Click Create a DKIM Selector for This Domain.

- Copy the host name and values provided in the fields of the pop-up window

- Copy the host name and values provided in the fields of the pop-up window.

- Navigate to your DNS provider and add a TXT record containing the copied information. If you’re using Sendmarc for DKIM managment, you can add the keys directly to the platform by completing this process.
- Once you’ve created the TXT record in your DNS provider, click OK in the DKIM Selectors Details window in your KSAT console.
- Click Save Changes at the bottom of your Account Settings page.
- For further assistance with this feature, please contact our support team and they will be happy to help.
How to update your DKIM settings using Sendmarc
To update your DKIM record through Sendmarc, please refer to the Sendmarc DKIM Setup Documentation.
KnowBe4’s Documentation
KnowBe4’s official DKIM configuration guide can be found here.
Looking for SPF Settings?
Find out how to configure your KnowBe4 SPF settings here.
