

Mailjet DKIM Setup
DKIM (DomainKeys Identified Mail) is an email authentication protocol that adds a digital signature to your emails. It helps verify that the email truly came from your domain and hasn’t been altered during delivery. Enabling DKIM improves your domain’s reputation and helps prevent spoofing and phishing attacks.
This article will guide you through the steps to set up DKIM for your domain using Mailjet as your email service provider.
Mailjet DKIM Requirements
To enable DKIM for your domain, you’ll first need to add Mailjet’s DKIM record to your DNS settings. This domain key allows receiving servers to verify that emails are genuinely sent from your domain and haven’t been altered in transit.
While the interface and terminology may vary slightly between domain registrars (like GoDaddy, Cloudflare, or Namecheap), the overall setup process remains consistent.
Here’s how to get started:
- Log in to your Mailjet account.
- Go to your Sending Domain Authentication page.
- This section lists all your sending domains, along with their SPF and DKIM authentication statuses.
- Anytime you add a new sending email address or domain, it will automatically appear here
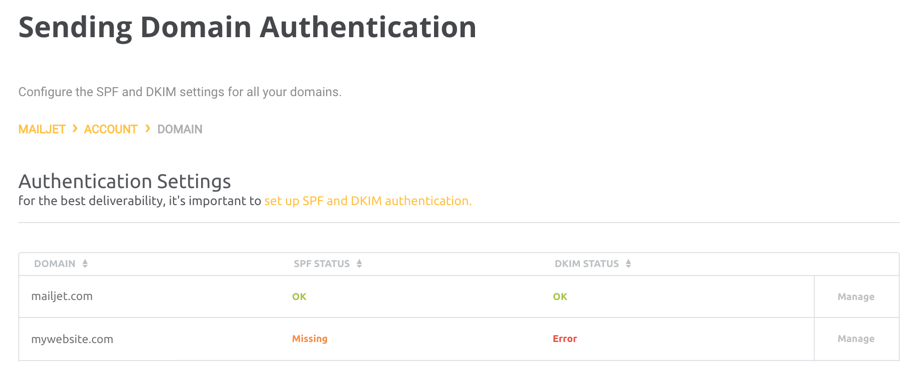
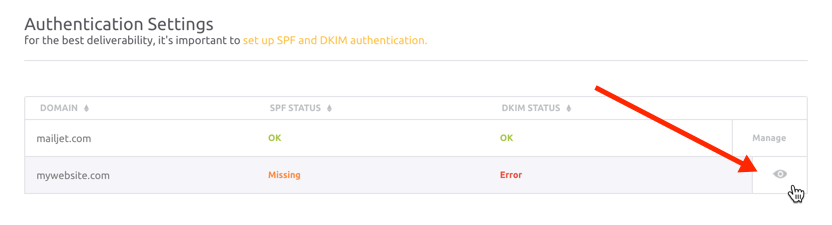
- For the domain you want to authenticate, click on ‘Manage’ to view the SPF & DKIM values.
- You will then see a screen with the status of your SPF and DKIM states, your DKIM key is also on this screen.
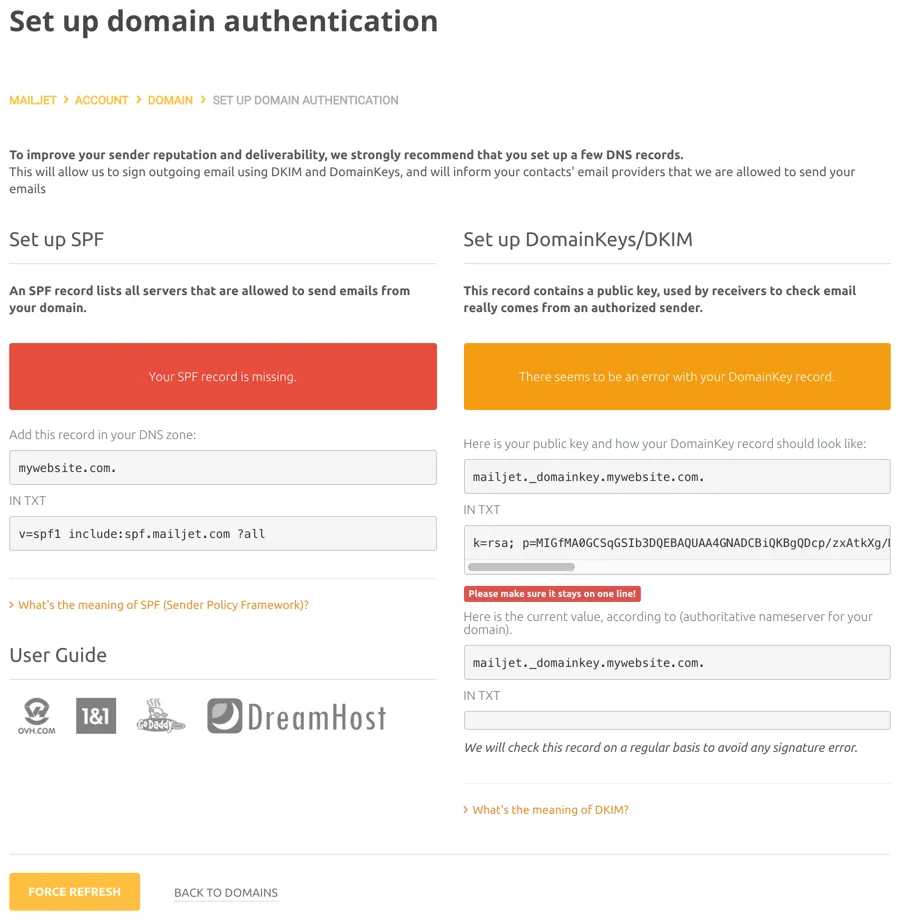
To set up DKIM authentication, you will be creating a new DKIM record. (Unlike SPF records, there are no issues with having multiple DKIM DNS records in your domain.)
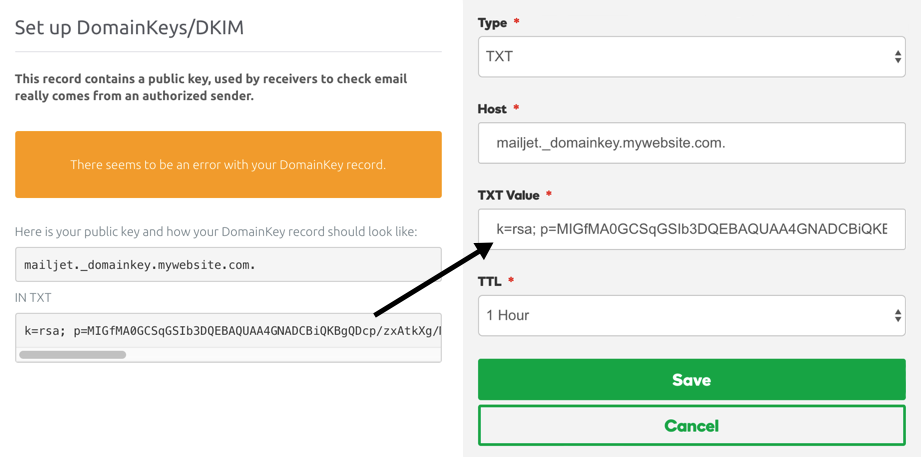
Create a new DNS record of type TXT from your domain hosting account or in Sendmarc’s DKIM Management interface.
In the Host Field, add the value displayed in the Mailjet interface:
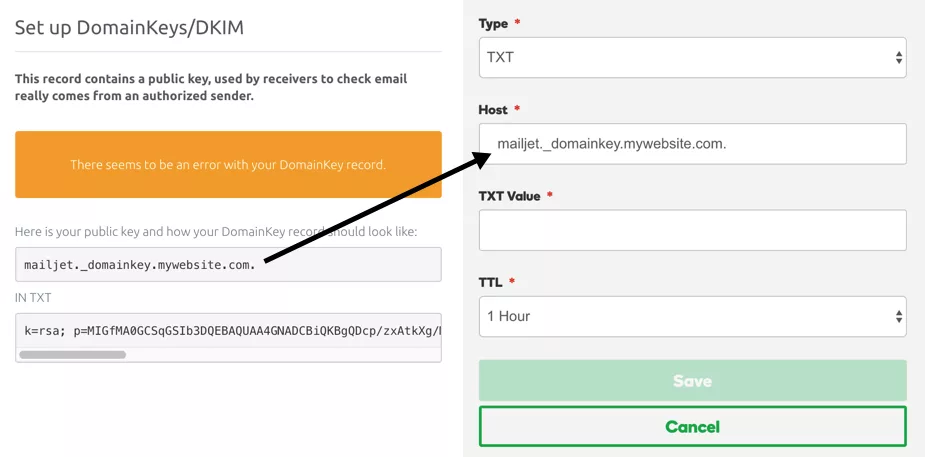
- The second step is to copy the DKIM value into the TXT Value Field.
Verify your DNS Status
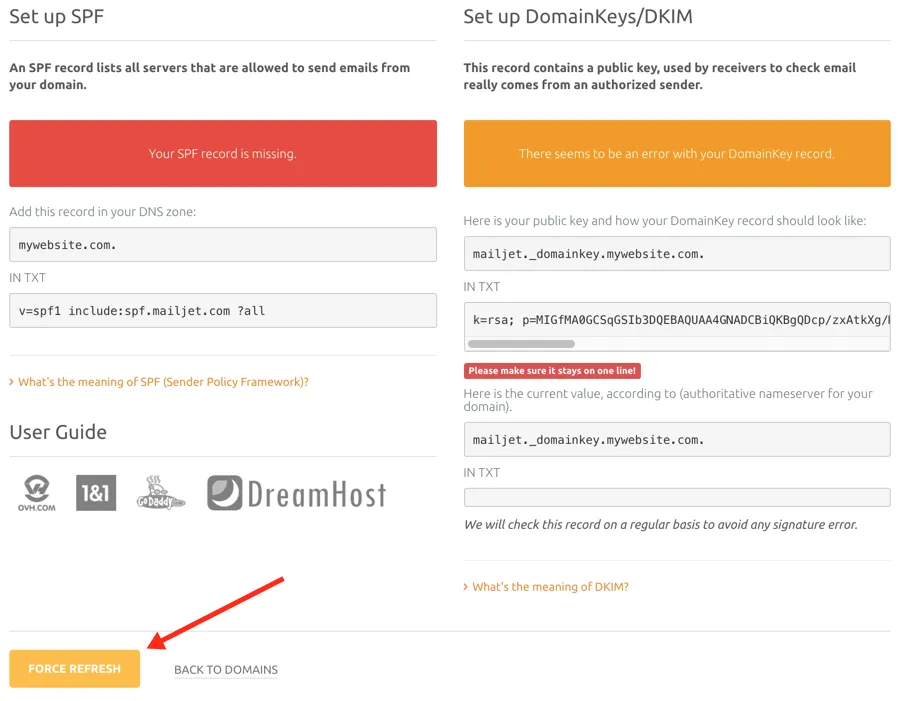
Once you have completed and saved your SPF & DKIM records, jump back to your Mailjet page and click the ‘Force Refresh’ button.
Once your domain has been authenticated, you will see the green ‘looks good’ message.
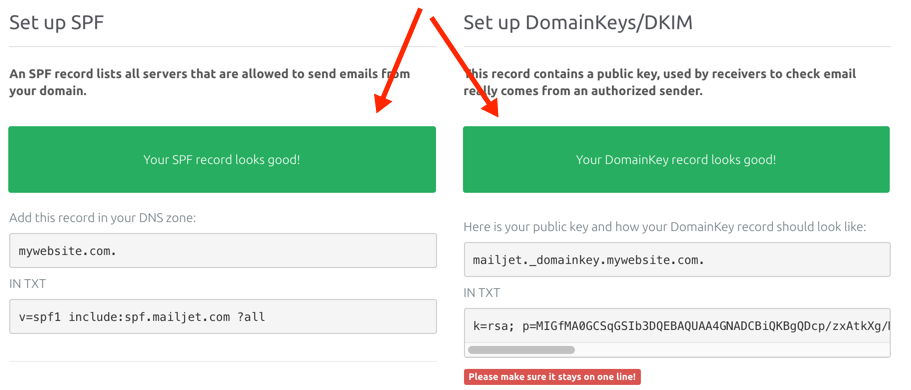
Note: You need to force a refresh to check the status as Mailjet does not automatically check for SPF & DKIM changes.
Your DNS changes may take up to 24 hours to reach the Mailjet system.
How to update your DKIM settings using Sendmarc
To update your DKIM record through Sendmarc, please refer to the Sendmarc DKIM Setup Documentation.
Mailjet’s Documentation
Mailjet’s official DKIM configuration guide can be found here.
Looking for SPF Settings?
Find out how to configure your Mailjet SPF settings here.