

Marketo DKIM Setup
DKIM (DomainKeys Identified Mail) is an email authentication protocol that adds a digital signature to your messages, helping verify that they were sent from your domain and haven’t been altered in transit.
This guide walks you through setting up DKIM for Marketo, Adobe’s marketing automation platform used to manage and deliver email campaigns securely and reliably.
Marketo DKIM Requirements
Prerequisites
- You must be an Admin in Marketo to add DKIM.
- Your “From” domain must already exist in your DNS provider.
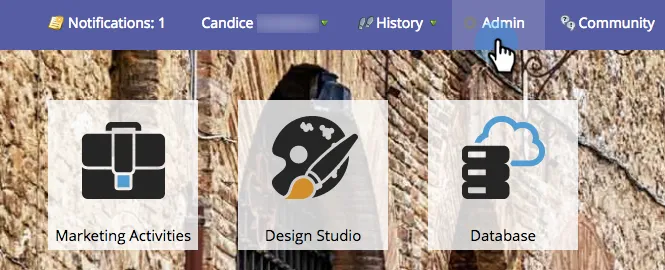
- Go to the Admin section in the Marketo interface.
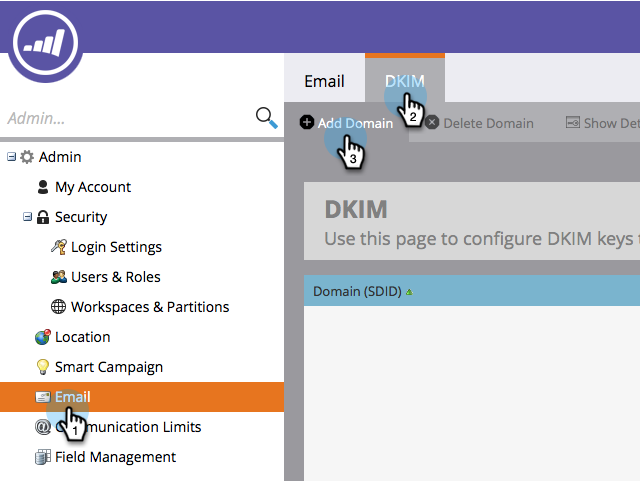
- Click Email, then the DKIM tab, and finally Add Domain.
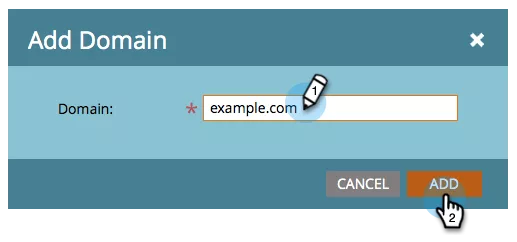
- Enter the domain you will be using in Marketo emails as the From Address and click Add.
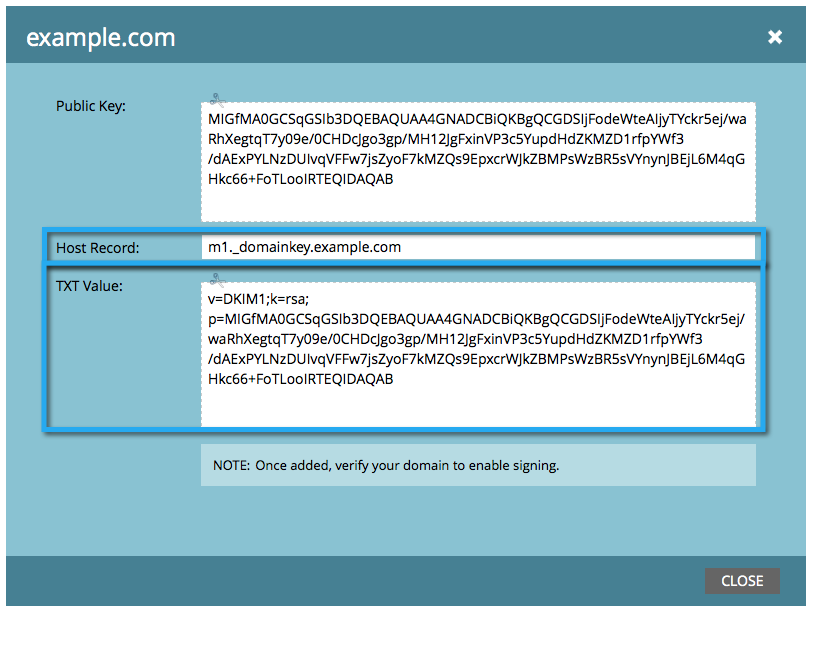
- Make sure the Host Record and TXT Value propagates to all nameservers associated with the from domain. Marketo’s DKIM verification requires that the DKIM key is propagated to all nameservers associated with the domain being DKIM-signed. If you’re using Sendmarc to manage your DNS, follow the steps outlined here.
- Come back to Marketo, select your domain, and click Check DNS.
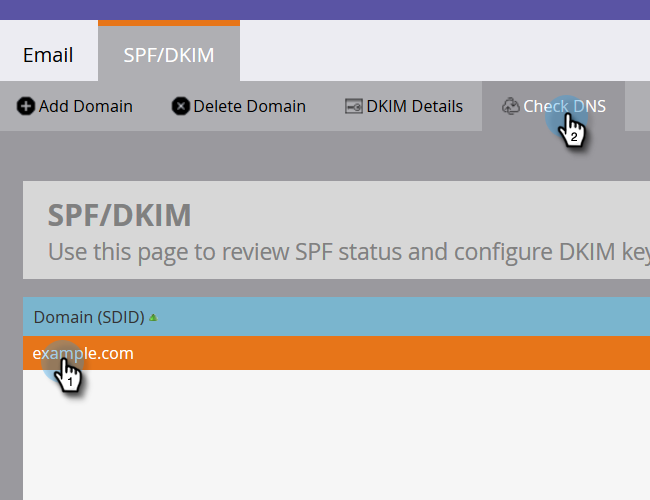
- If propagation is complete, Marketo shows a success message.
- If you receive a failure, wait a bit longer or confirm the TXT record exists on every nameserver.
Note: Some DNS hosts take up to 24 hours to propagate. You can query with dig or an online DNS checker to verify before retrying Check DNS in Marketo.
How to update your DKIM settings using Sendmarc
To update your DKIM record through Sendmarc, please refer to the Sendmarc DKIM Setup Documentation.
Marketo’s Documentation
Marketo’s official DKIM configuration guide can be found here.
Looking for SPF Settings?
Find out how to configure your Marketo SPF settings here.