Plesk DKIM Setup
DKIM (DomainKeys Identified Mail) adds a cryptographic signature to your outgoing emails, allowing receiving servers to verify the messages are authentic and haven’t been altered. Enabling DKIM helps improve trust in your messages and protects your domain from spoofing and phishing attacks.
Plesk is a widely used web hosting control panel that includes tools to manage mail services and DNS records, including built-in support for DKIM.
This guide will show you how to enable and configure DKIM for your domain in Plesk.
Plesk DKIM Requirements
If You Use Plesk as Your DNS Provider
-
Go to Websites & Domains
-
Select your domain
-
Open the Mail tab
-
Click Mail Settings
-
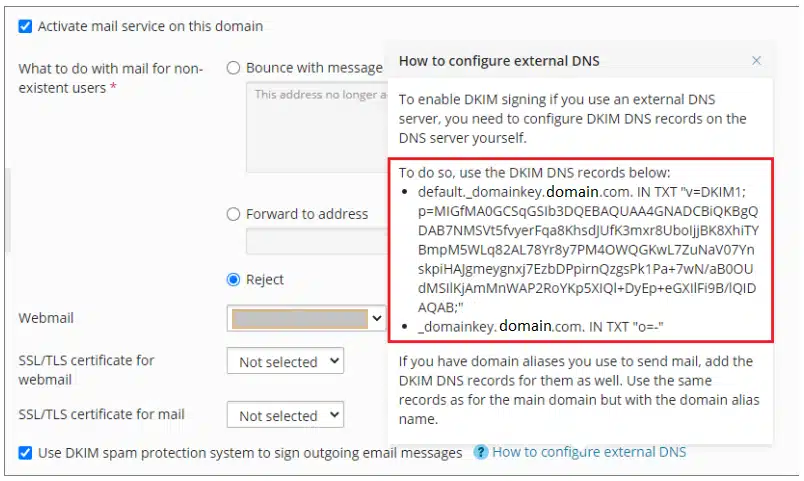
Check the box for Use DKIM spam protection system to sign outgoing email messages

If You Use an External DNS Provider
If your DNS is managed outside of Plesk (e.g., Cloudflare, GoDaddy or Sendmarc), you’ll need to manually add DKIM records to your external DNS. The steps to do so in Sendmarc are here.
To get the required DKIM records:
-
In Plesk, go to the Mail Settings section for your domain
-
Click How to configure external DNS
-
Copy the generated DKIM record values
-
Log in to your DNS provider and add the provided records as TXT entries

Be sure to wait for DNS propagation, which may take several minutes to a few hours depending on your DNS host.
How to update your DKIM settings using Sendmarc
To update your DKIM record through Sendmarc, please refer to the Sendmarc DKIM Setup Documentation.
Plesk’s Documentation
Plesk’s official DKIM configuration guide can be found here.
Looking for SPF Settings?
Find out how to configure your Plesk SPF settings here.