Postmark DKIM Setup
DKIM (DomainKeys Identified Mail) is an email authentication protocol that adds a digital signature to outbound messages, allowing the recipient’s server to verify that the message hasn’t been tampered with and that it truly comes from your domain. This protects your brand and recipients from email spoofing and phishing attacks.
Postmark, a transactional email service known for its fast delivery and strong reputation management, requires you to configure DKIM for your domain to ensure optimal email authentication.
This guide explains how to configure DKIM for your domain when sending through Postmark.
Postmark DKIM Requirements
Note: Postmark will always provide you with a custom DKIM signature.
In your Postmark interface, follow the following steps:
- Navigate to your Sender Signatures tab.
- Under the domain you are adding DKIM authentication for, click DNS Settings or Add a DKIM DNS record.

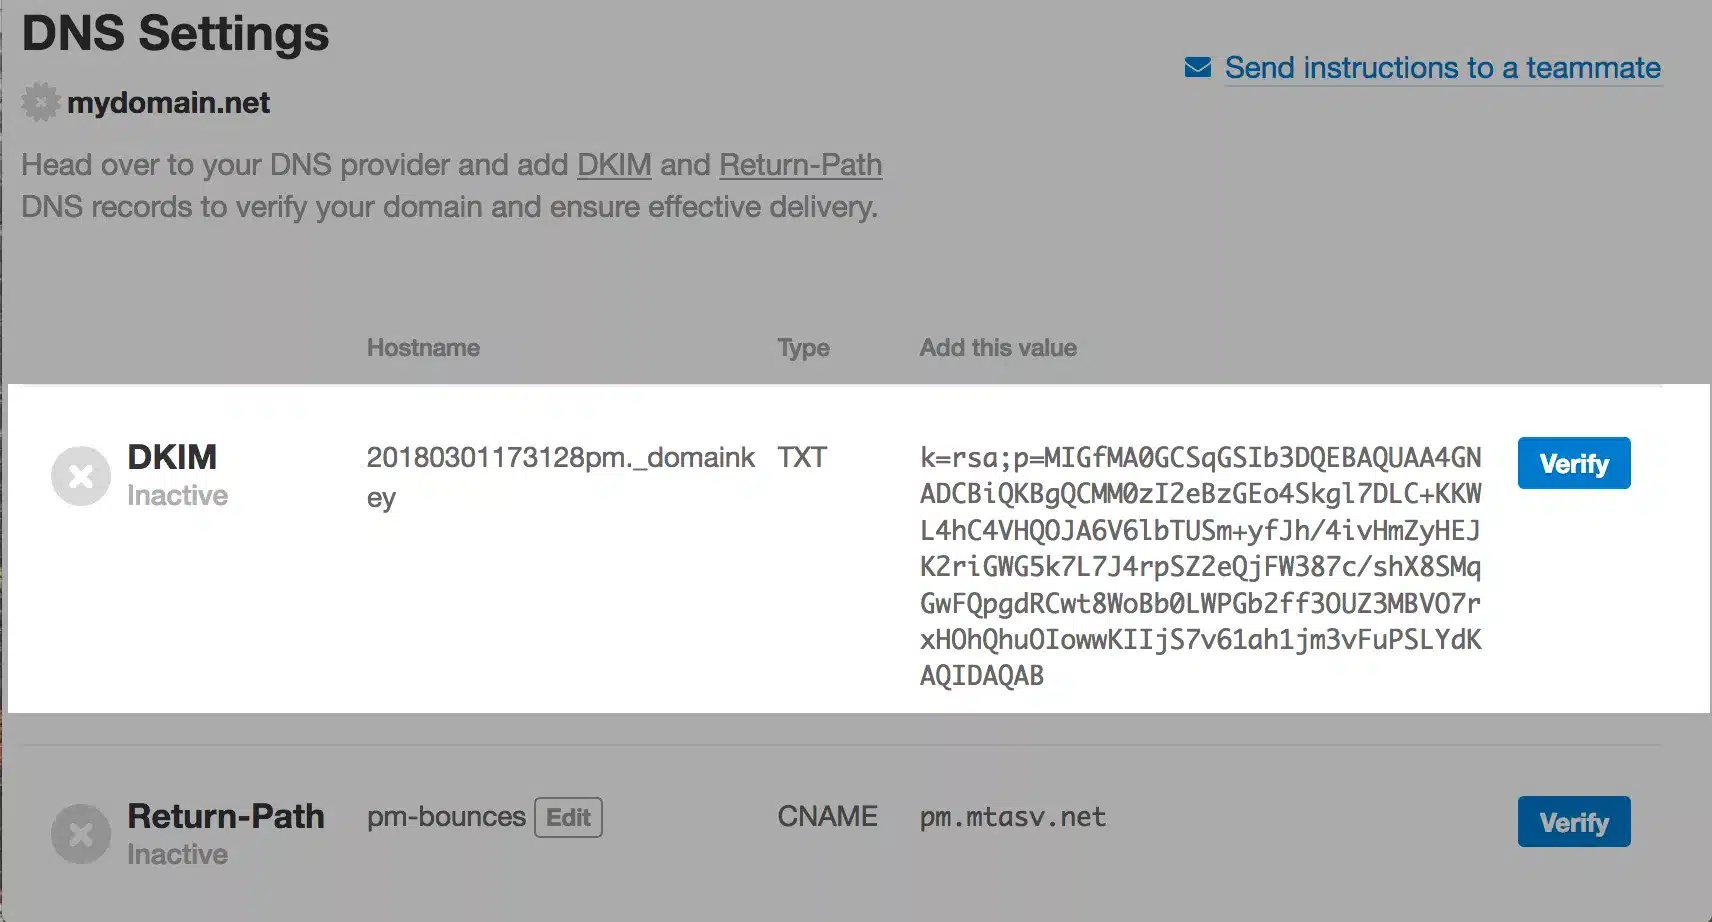
- A DKIM record will be shown that needs to be added to your DNS as a TXT record.

- Once the key is generated, you will need to load the key into your DNS. If you’re using Sendmarc for DKIM, management you can add the key to Sendmarc by following the steps described here. The key will will resemble the below:
Type Host TXT Value TTL TXT 20180301173128pm._domainkey Paste the key generated here 1 hour (Default)
5. Once the key is published, head back to Postmark and select Verify.
How to update your DKIM settings using Sendmarc
To update your DKIM record through Sendmarc, please refer to the Sendmarc DKIM Setup Documentation.
Postmark’s Documentation
Postmark’s official DKIM configuration guide can be found here.
Looking for SPF Settings?
Find out how to configure your Postmark SPF settings here.

