SMTP2GO DKIM Setup Instructions
DKIM (DomainKeys Identified Mail) is an authentication protocol that uses cryptographic signatures to ensure that email messages are not tampered with during transit and truly originate from your domain.
This guide outlines how to configure DKIM for SMTP2GO, a cloud-based SMTP relay service designed for secure and authenticated email delivery.
SMTP2GO DKIM Requirements
To configure DKIM (and SPF) with SMTP2GO, you’ll need to verify your sender domain and publish the required DNS records. Follow the steps below.
Step 1: Access the Verified Senders Page
Log in to your SMTP2GO dashboard.
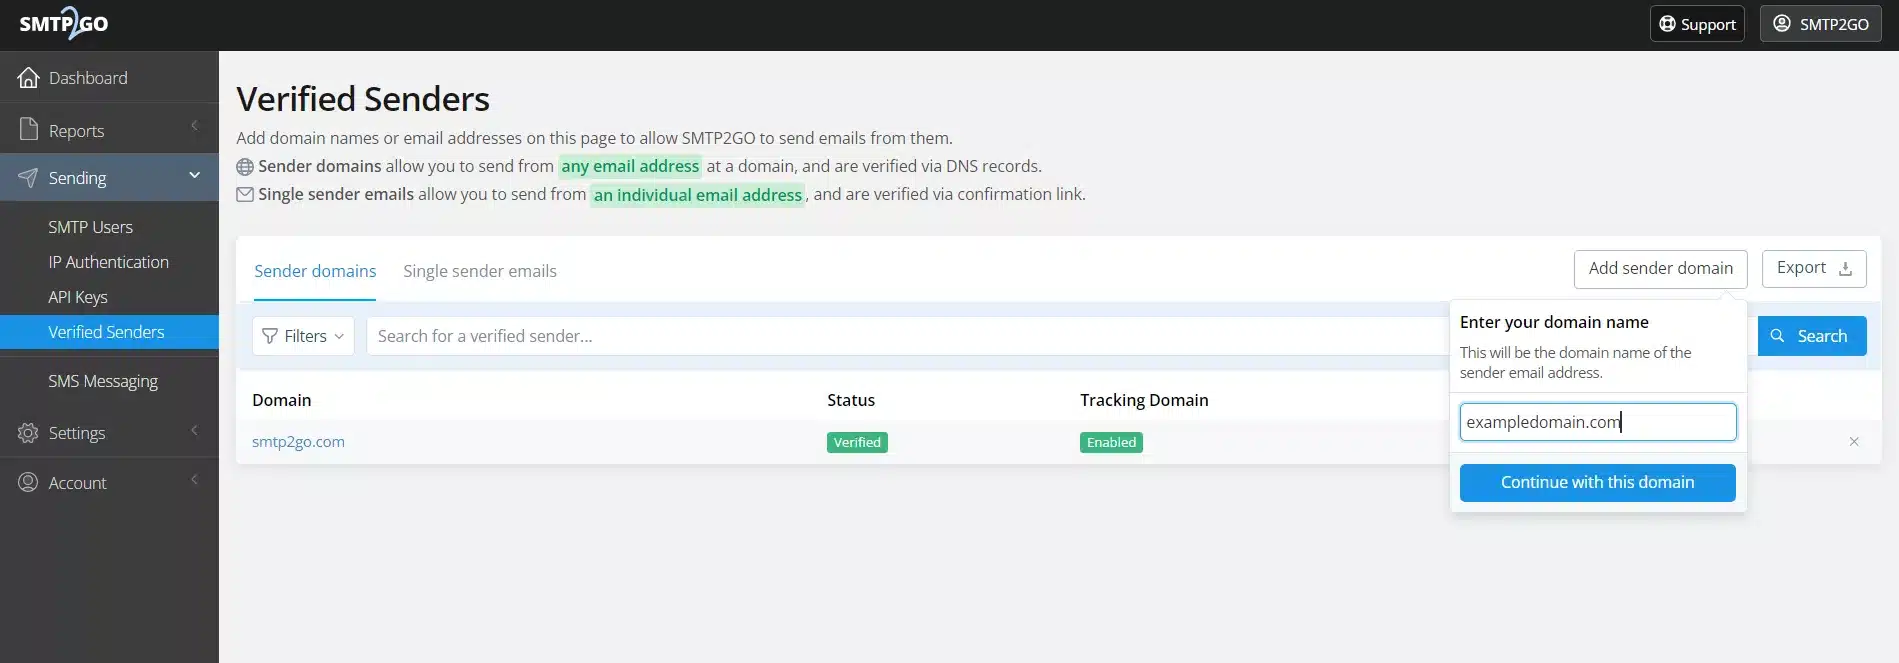
In the left-hand menu, navigate to:
Sending > Verified Senders > Sender domainsClick Add sender domain, enter your domain (e.g.,
exampledomain.comif you’re sending from[email protected]), and click Continue with this domain.
Step 2: DNS Records Setup
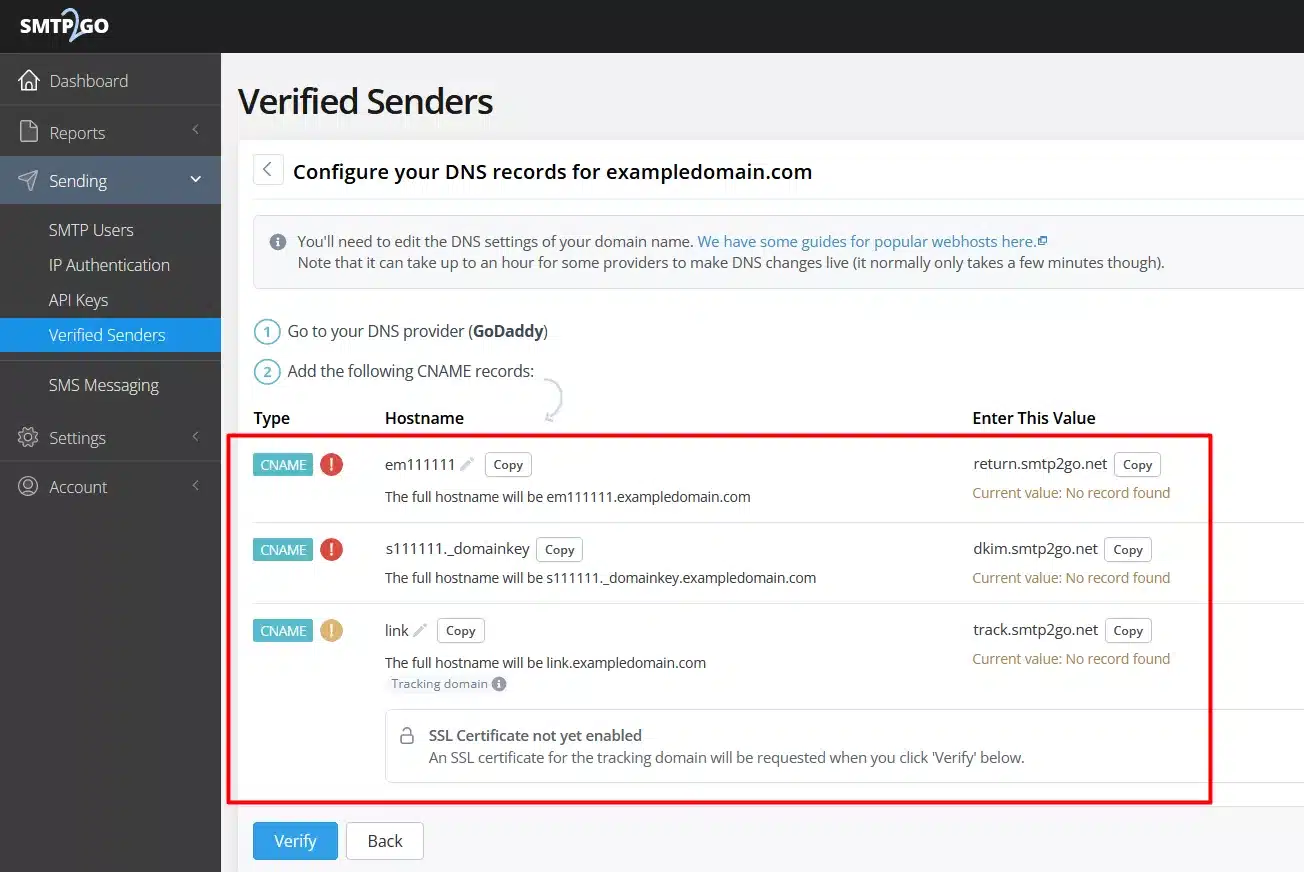
After adding your sender domain, SMTP2GO will generate CNAME records for DKIM and SPF.
Copy these values exactly as shown in the interface. Add the generated CNAME records to your domain’s DNS provider.

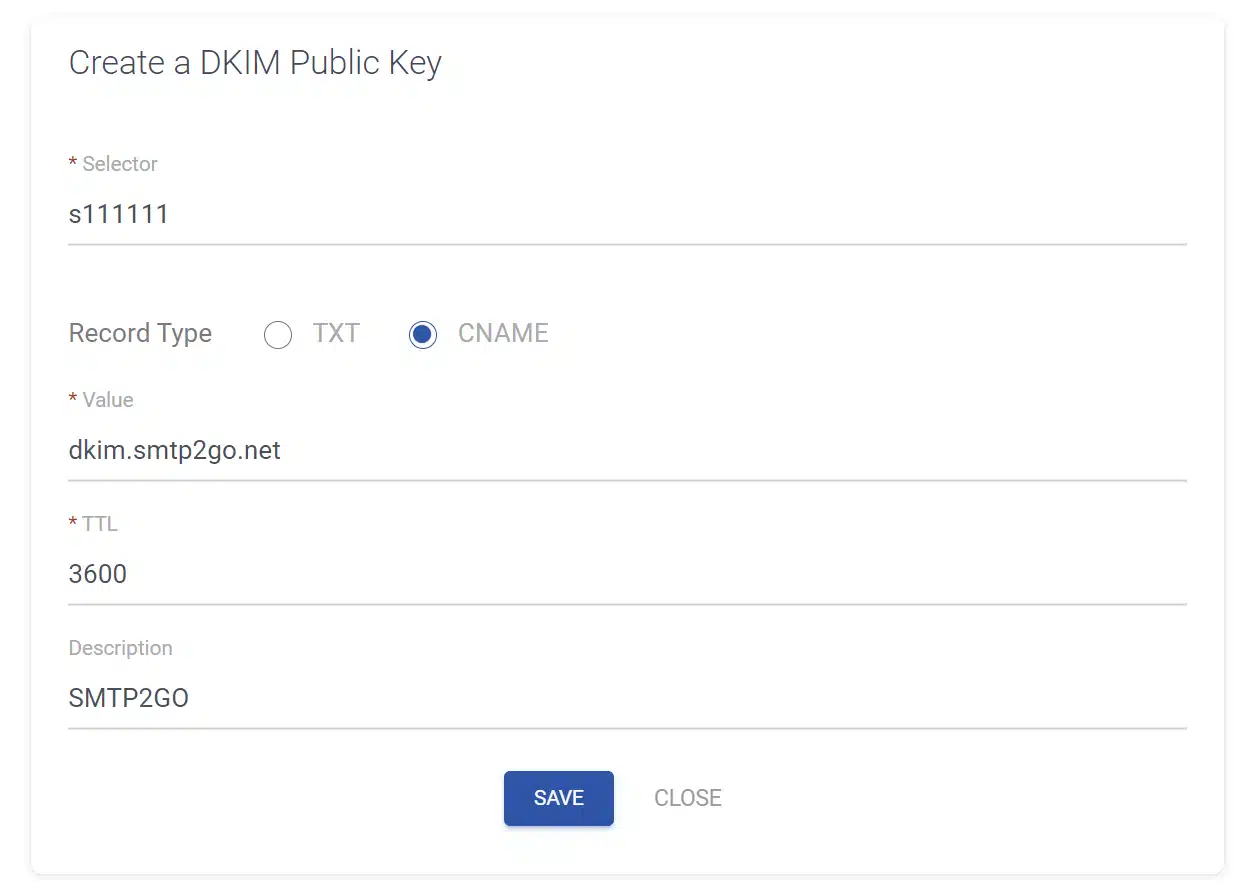
Step 3: Add DKIM Keys to Sendmarc or DNS
If you are using Sendmarc for DNS record management, make sure to input the generated DKIM CNAME entries into your Sendmarc Portal. 
If you’re not using Sendmarc for DKIM management, add all entries (including your DKIM keys) to your DNS.
Step 4: Add Additional CNAME Records for Alignment & Tracking
Important: These CNAME records must go directly into your DNS — not into Sendmarc.
EM Subdomain (Return Path Alignment)
This top CNAME record represents a subdomain that allows your return path domain to align with your sending domain.Tracking Domain
This bottom CNAME record ensures all email links use securehttpsrather thanhttp.
Step 5: Record Validation
Return to the SMTP2GO dashboard.
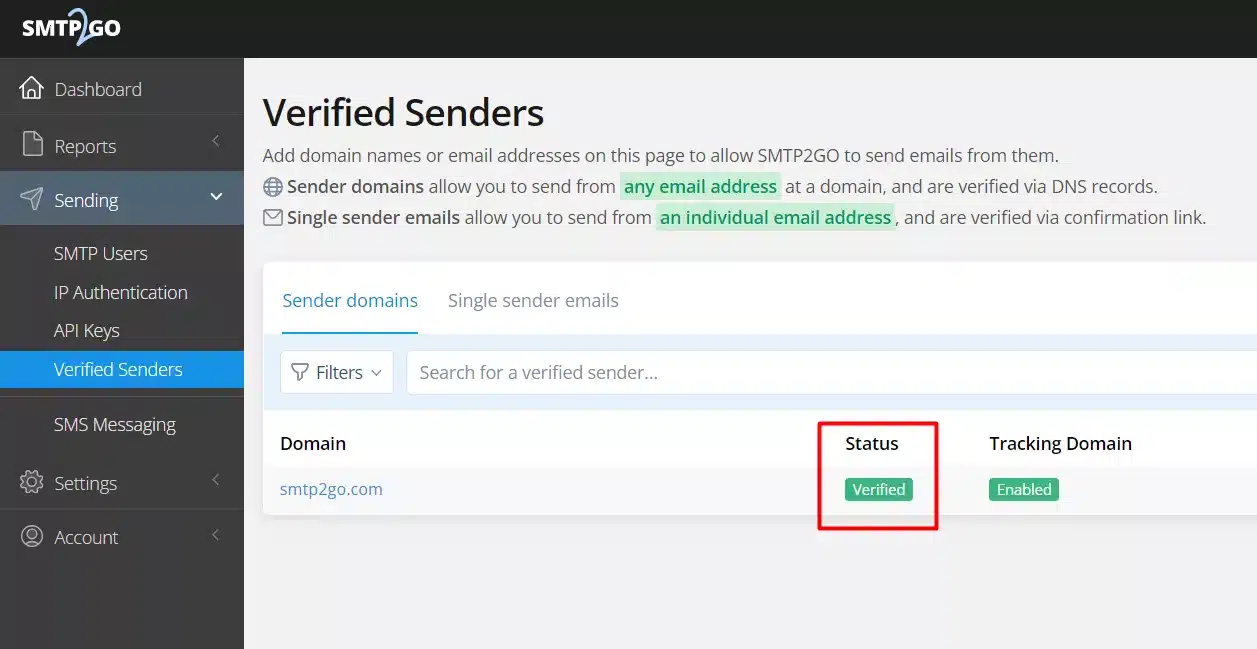
Click the Validate button next to your domain.
Once validated successfully, your domain will begin authenticating with DKIM and SPF.

How to update your DKIM settings using Sendmarc
To update your DKIM record through Sendmarc, please refer to the Sendmarc DKIM Setup Documentation.
SMTP2GO’s Documentation
SMTP2GO’s official DKIM configuration guide can be found here.
Looking for SPF Settings?
Find out how to configure your SMTP2GO SPF settings here.


