

Zendesk DKIM Setup
DKIM (DomainKeys Identified Mail) is an email authentication protocol that uses cryptographic signatures to confirm that messages haven’t been altered in transit and genuinely come from your domain.
This guide outlines how to configure DKIM for Zendesk, a customer service and support platform that allows you to send emails on behalf of your domain.
Zendesk DKIM Requirements
Prerequisites
- Admin access to your Zendesk Support instance
- DNS (or Sendmarc DKIM Key Manager) access for your sending domain
- Navigate to Zendesk and select Admin > Channels > Email
- Locate the section “Custom domain for DKIM”

- Navigate to your DNS zone and create two new Zendesk CNAME records. To add these to your Sendmarc environment, follow the steps provided here.
Host Type Value zendesk1._domainkey CNAME zendesk1._domainkey.zendesk.com zendesk2._domainkey CNAME zendesk2._domainkey.zendesk.com 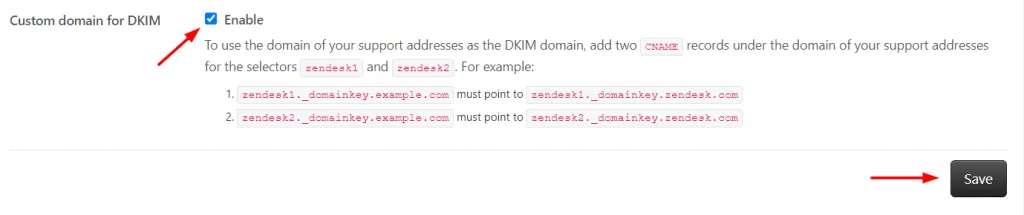
4.When both CNAME records are added in your DNS zone, head back to Zendesk, navigate to Custom domain for DKIM and click on the “Enable button” and then click on “Save”.
Note: DNS propagation can take up to 24 hours. If Zendesk cannot verify, wait and retry.
How to update your DKIM settings using Sendmarc
To update your DKIM record through Sendmarc, please refer to the Sendmarc DKIM Setup Documentation.
Zendesk’s Documentation
Zendesk’s official DKIM configuration guide can be found here.
Looking for SPF Settings?
Find out how to configure your Zendesk SPF settings here.