Brevo (Sendinblue) DKIM Setup
DKIM (DomainKeys Identified Mail) is an email authentication method that uses cryptographic signatures to ensure your emails aren’t modified during delivery and genuinely come from your domain.
This guide explains how to configure DKIM for Brevo (formerly Sendinblue), a cloud-based platform for email marketing, automation, and customer engagement.
Brevo (Sendinblue) DKIM Requirements
Step 1: Add your domain to Brevo
This step is necessary because you can’t configure DKIM unless the domain is first added to your Brevo account.
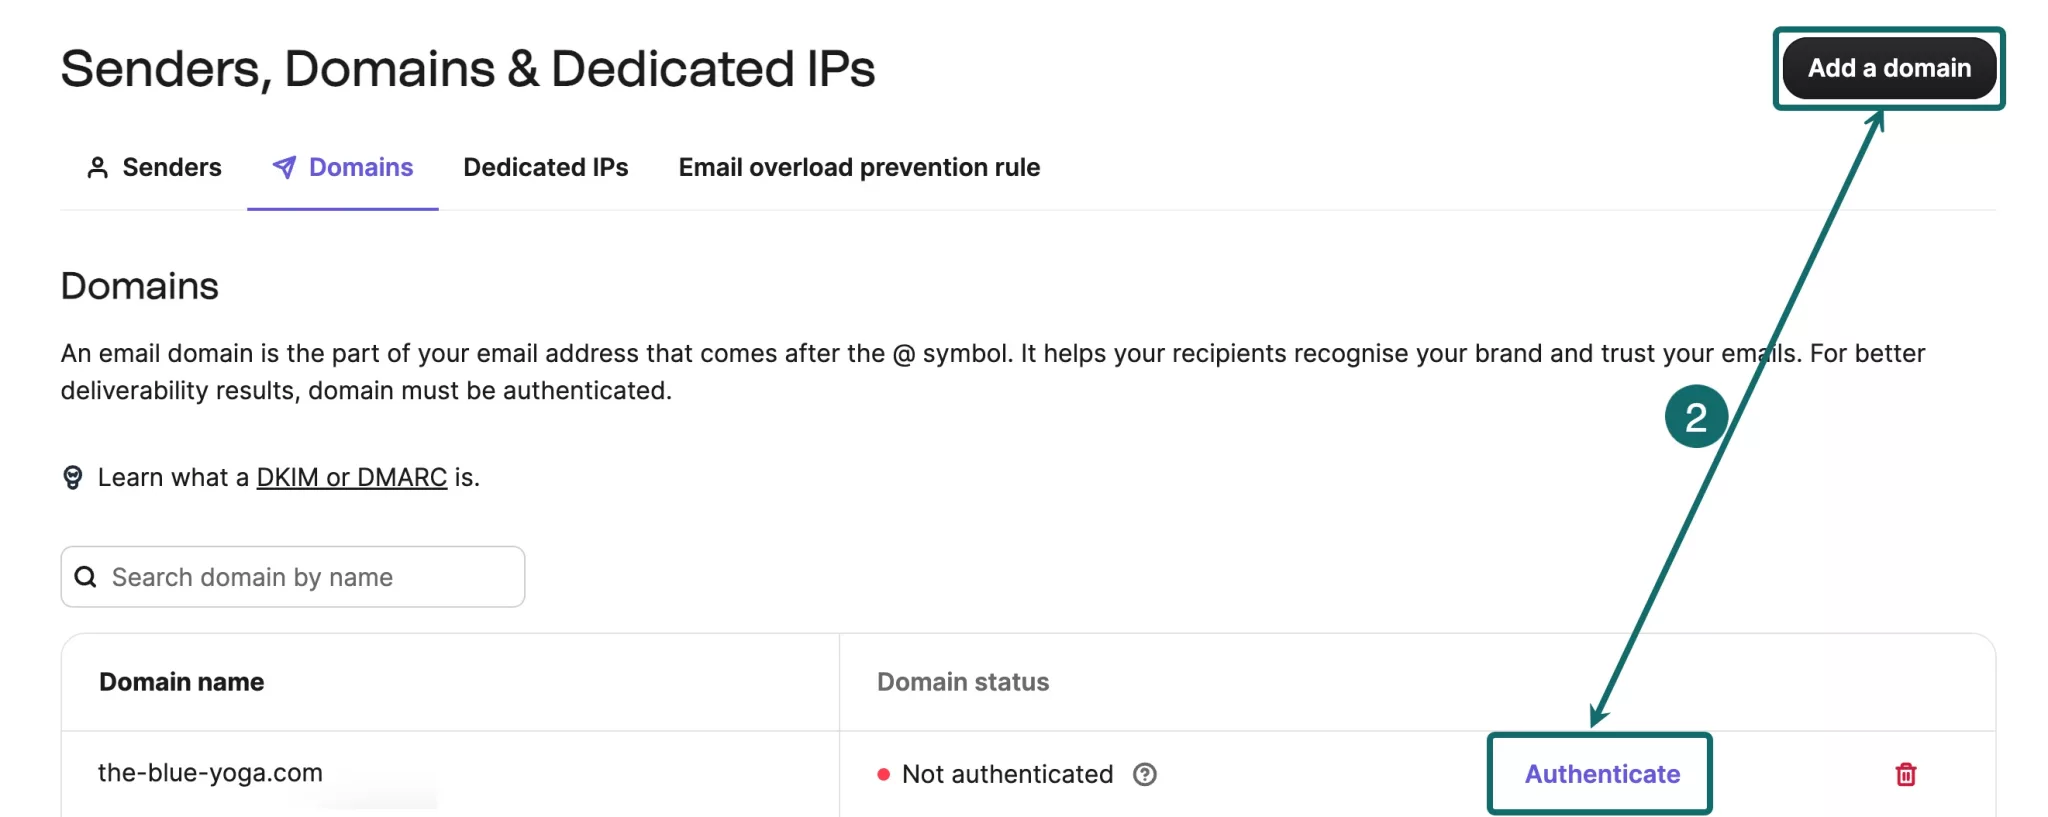
- In Brevo, click the account dropdown and select Senders, Domains, and Dedicated IPs.
- Go to the Domains page.
- Click Add a domain. If your domain already appears on the page, click Authenticate next to it instead.

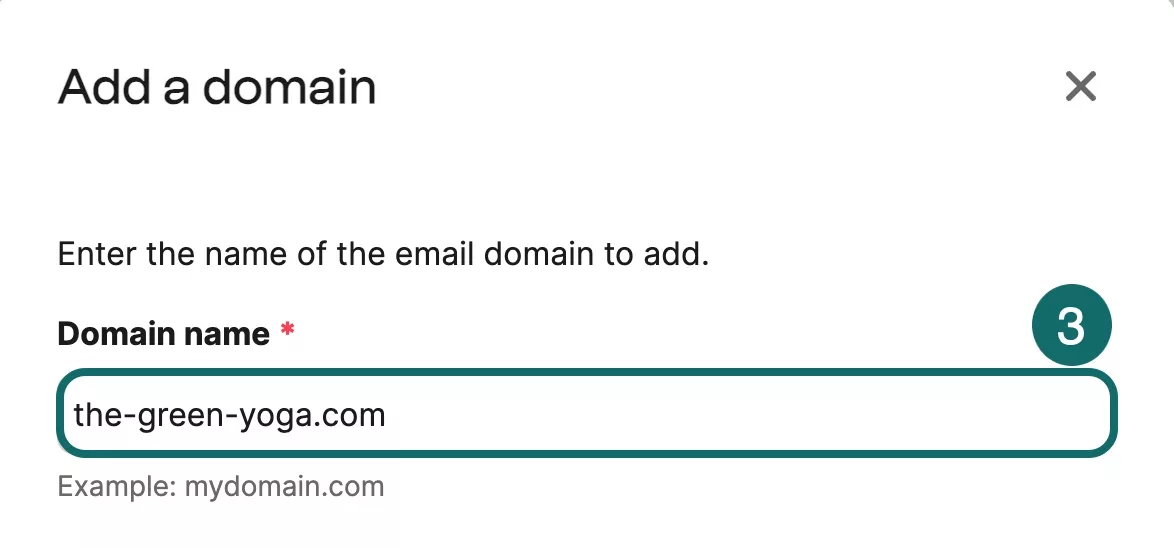
- Enter the name of your domain. This is typically the part of your email address that comes after the “@” symbol. For example, if your email address is [email protected], the domain you need to add is mycompany.com.

- Click Add domain.
Step 2: Authenticate the domain yourself
If you prefer to manually set up authentication, choose the “Authenticate the domain yourself” option. Brevo will display a list of DNS records you’ll need to add to your domain’s DNS settings or into Sendmarc if that’s where you’re managing your DKIM keys.
To enable DKIM, locate the record labeled DKIM — this ensures your emails are signed with a secure digital signature and protected against tampering.
| Name | Type | Purpose |
|---|---|---|
| DKIM record | TXT or 2 CNAMEs | Signs and secures your emails with a digital signature |
Brevo may show either: 1 TXT record or 2 CNAME records
Step 2: Verify if your domain is authenticated
Even though this step also checks SPF/DMARC/Brevo code, it’s required to confirm your DKIM setup as well.
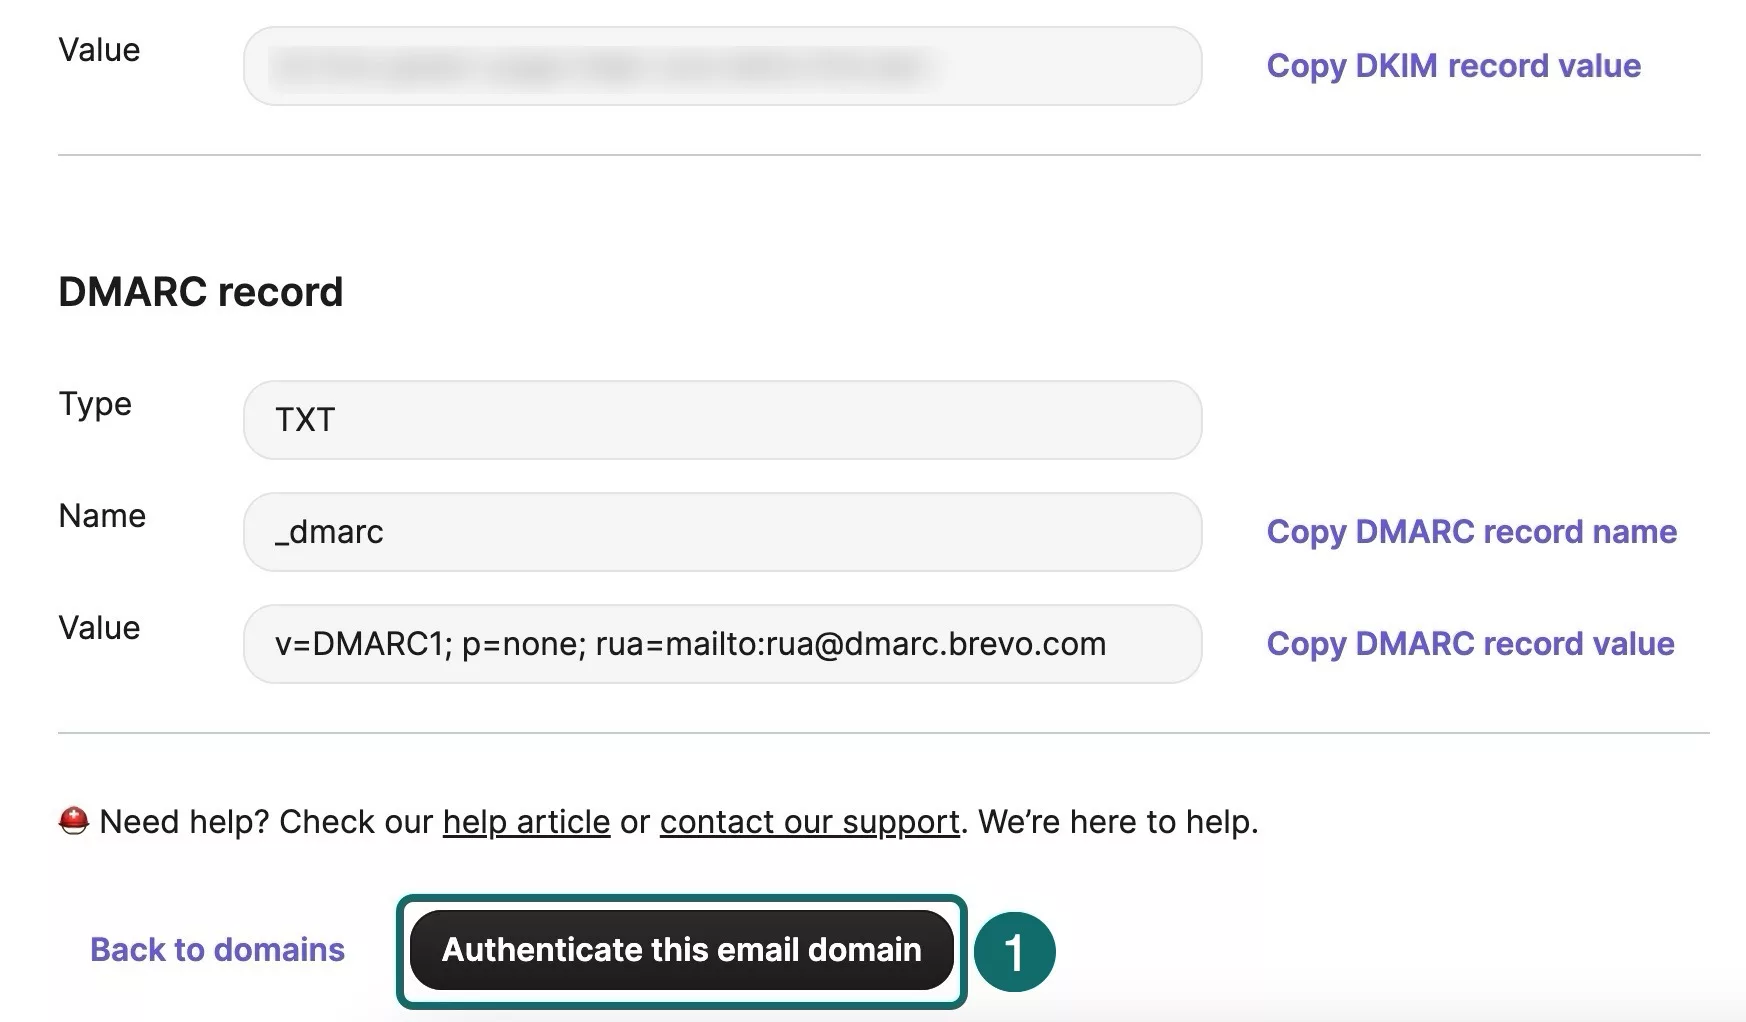
Click Authenticate this email domain

Wait up to 48 hours for the DKIM record to propagate.
Check for status as “Authenticated”
 Note:If your domain is not authenticated, a popup window will appear saying “The domain is not authenticated yet”. Try again later by clicking View configuration next to the status, then selecting Authenticate this email domain at the bottom of the page. Note that full authentication can take up to 48 hours.
How to update your DKIM settings using Sendmarc
To update your DKIM record through Sendmarc, please refer to the Sendmarc DKIM Setup Documentation.
Brevo’s Documentation
Brevo’s official DKIM configuration guide can be found here.
Looking for SPF Settings?
Find out how to configure your Brevo SPF settings here.


 Note:If your domain is not authenticated, a popup window will appear saying “The domain is not authenticated yet”. Try again later by clicking View configuration next to the status, then selecting Authenticate this email domain at the bottom of the page. Note that full authentication can take up to 48 hours.