Keap (Infusionsoft) DKIM Setup
DKIM (DomainKeys Identified Mail) is a widely used email authentication method that adds a digital signature to messages, verifying their legitimacy. Keap (formerly Infusionsoft) automatically signs outbound messages to protect against spoofing and phishing attempts.
This guide walks you through how DKIM is managed within Keap and how to enable it for your domain.
Keap (Infusionsoft) DKIM Requirements
Keap simplifies DKIM management by simply requiring that you enable siging and publish a few records. To enable DKIM Signing, follow these steps:
- In Keap, click on your avatar in the bottom left and then ‘Settings’.
- Click ‘Domains’.
- Next to your domain, select ‘+ Connect this domain’.
- Select your domain provider from drop-down . If you’re using Sendmarc to manage your DKIM settings, choose ‘Other’. Once selected, click ‘Continue’.
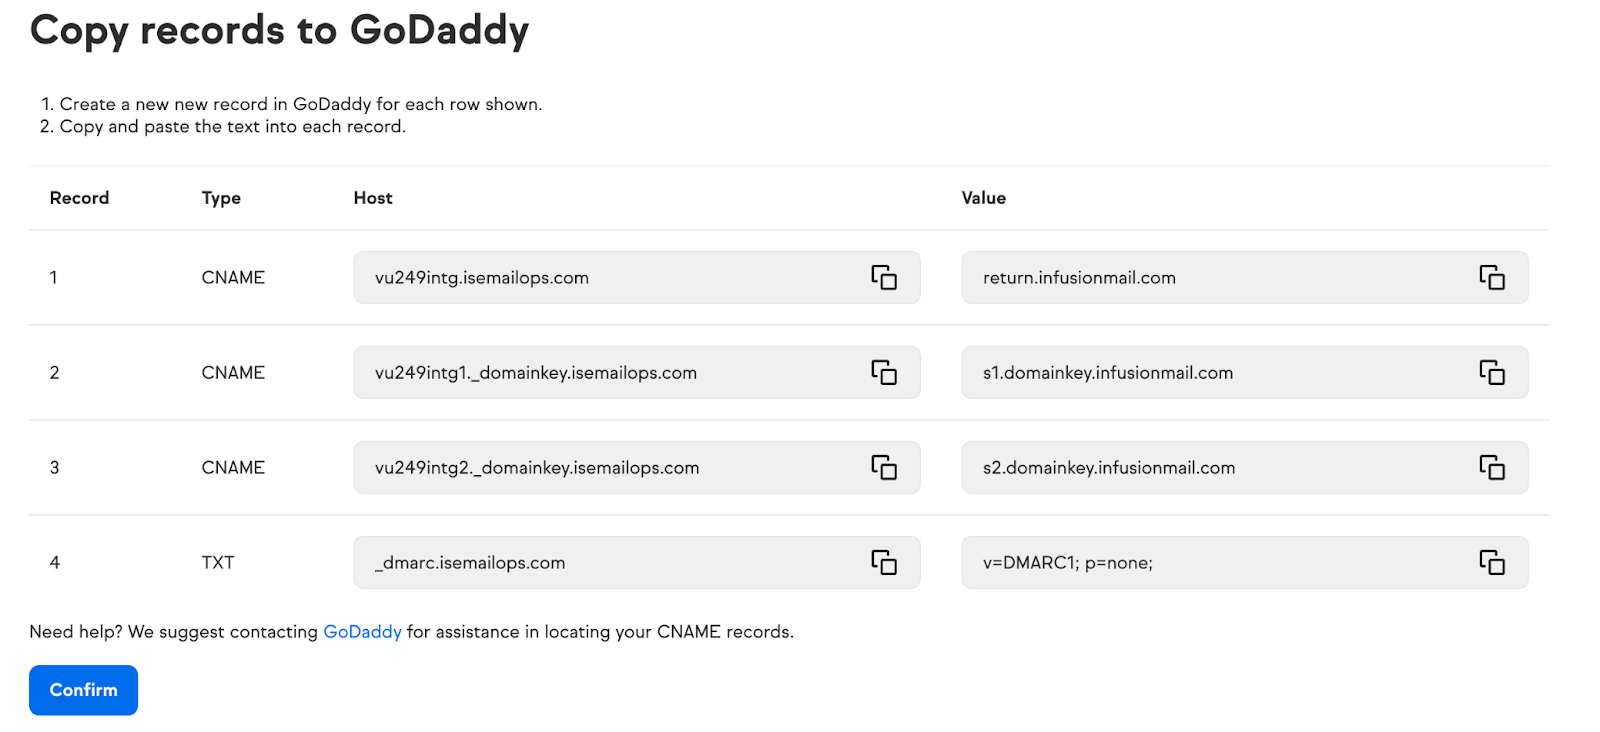
- Now, navigate to your domain provider and add the provided keys to your domain. NB: If you’re using Sendmarc, you’ll only need to add Record 1 to your domain. Record 2 and 3 can be added to Sendmarc by following these instructions. DO NOT ADD RECORD 4 – IT WILL BREAK YOUR DMARC REPORTING AND POLICY.

- Return to Keap and click ‘Confirm’. You domain will now verify.
How to update your DKIM settings using Sendmarc
To update your DKIM record through Sendmarc, please refer to the Sendmarc DKIM Setup Documentation.
Keap (Infusionsoft)‘s Documentation
Keap (Infusionsoft)‘s official DKIM configuration guide can be found here.
Looking for SPF Settings?
Find out how to configure your Keap (Infusionsoft) SPF settings here.
