Benchmark Email DKIM Setup
DKIM (DomainKeys Identified Mail) is a security protocol that allows email recipients to verify that messages sent from your domain are authorized and haven’t been modified in transit.
This guide outlines how to configure DKIM for your domain using Benchmark Email’s Domain Authentication system.
Benchmark DKIM Requirements
Step 1: Access Domain Authentication
Log in to your Benchmark Email account.
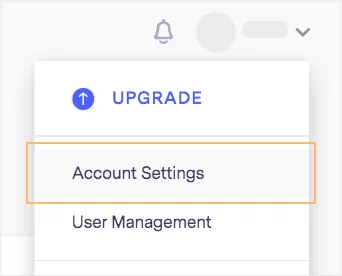
Click on your account name in the top navigation bar and select Account Settings.

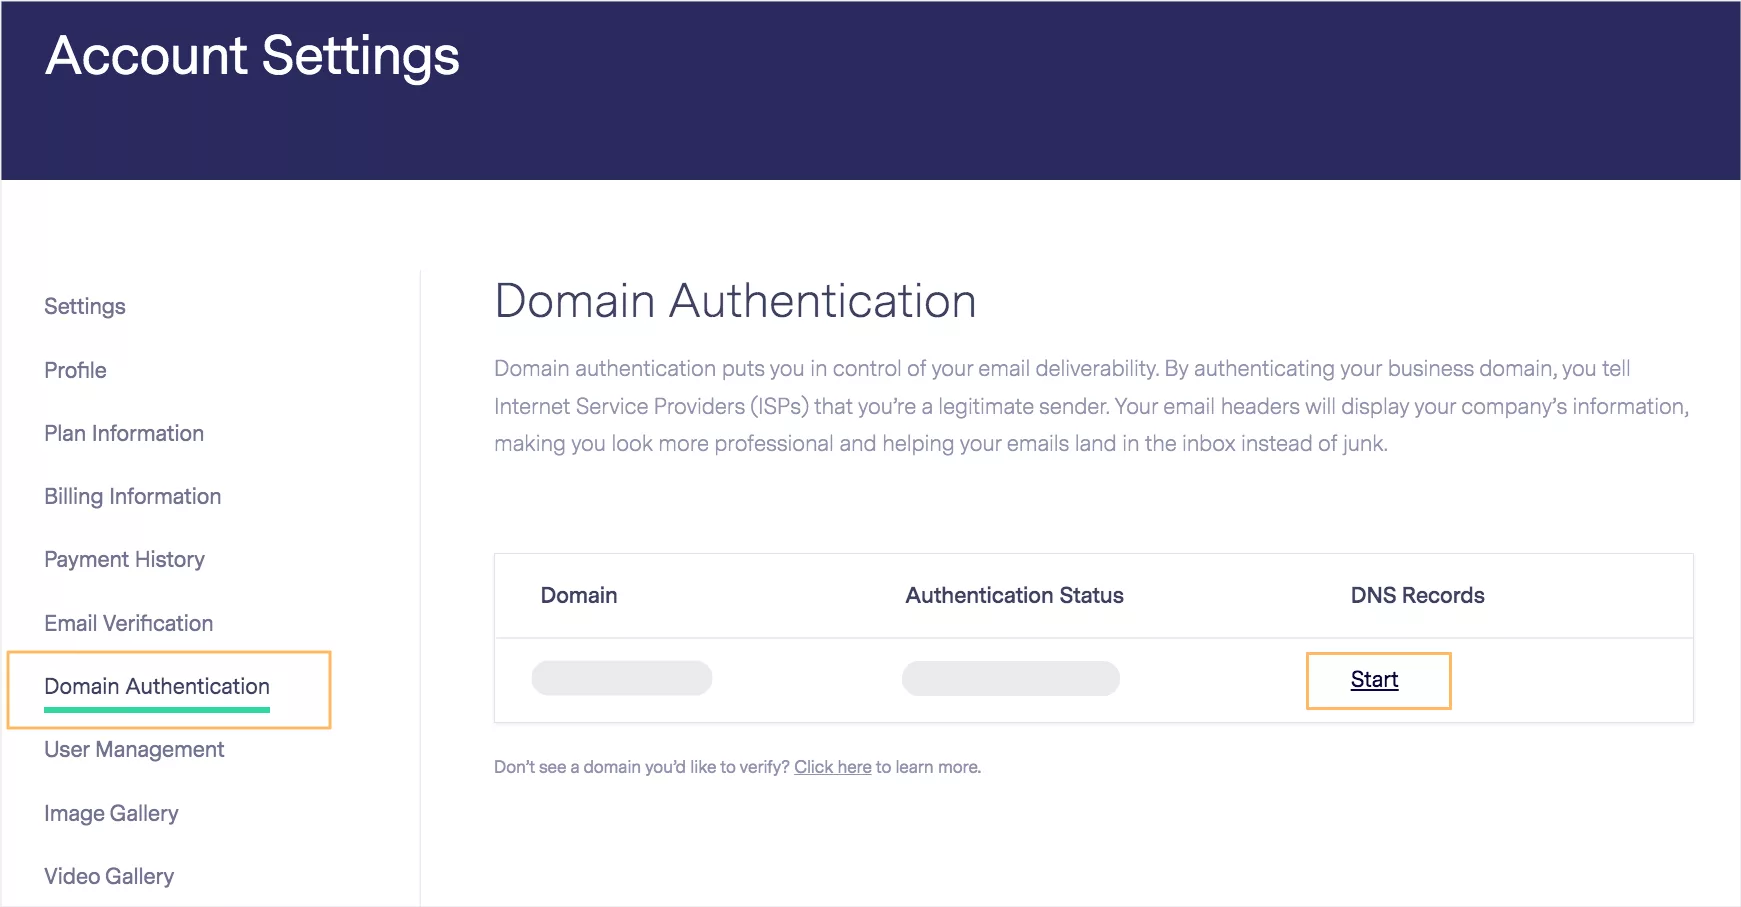
Navigate to the Domain Authentication section.
Locate the domain you want to authenticate and click Start next to it.

Confirm your selection by clicking Start Authentication.

Benchmark will now begin generating your DNS records. This process may take up to 30 minutes.
You can exit the page while the records are being prepared by clicking the X in the top-right corner.
Step 2: Add DNS Records
After the records are generated, return to the Domain Authentication page.
The DNS Record column will now display a View option instead of Start.
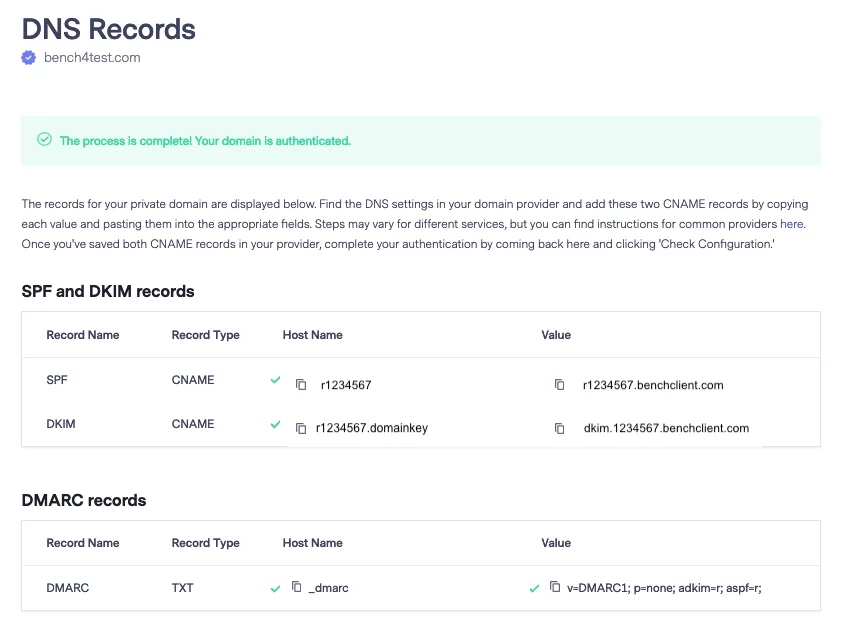
Click View to see the records that need to be added to your domain’s DNS.

Log in to your DNS hosting provider or – if you’re using Sendmarc for DKIM Managment – into the the Sendmarc’s DKIM Settings and add the required CNAME records. Do not add the DMARC record. Rather, use Sendmarc for your DMARC policy.
You will typically be required to add:
2 CNAME records for DKIM
1 optional DMARC record – do not add this record. Rather let Sendmarc manage your DMARC record.
Once the records are added, return to Benchmark and click Check Configuration.
Step 3: Confirm Authentication
If the records are correctly configured, you will see a success message and green checkmarks next to each record.

The authentication status will change to In Progress — no further action is needed at this point.
It may take up to 48 hours for DNS changes to propagate. The DKIM authentication period can take up to 24 hours.
While the domain is still being authenticated, Benchmark will temporarily send emails using its authenticated subdomain. Your own domain will not be used for sending until authentication is complete.
Once your domain is fully verified, the status will update to Authenticated, and DKIM will be active.
Troubleshooting
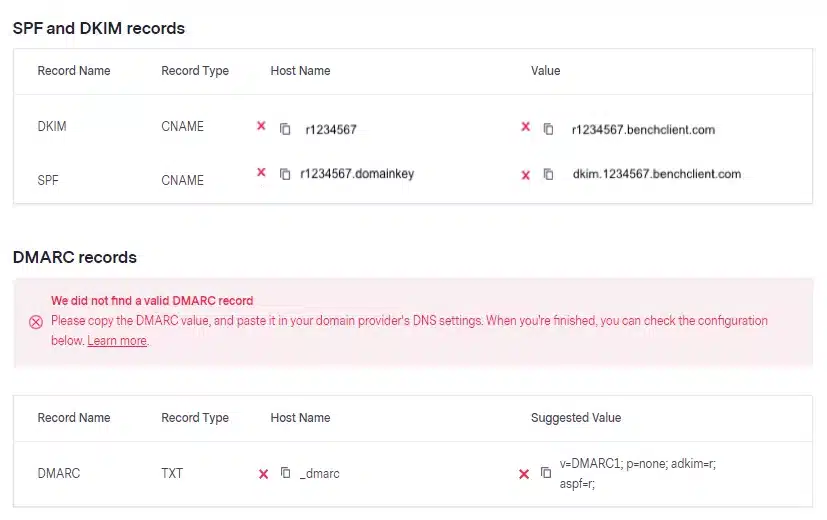
If your DNS records are not configured correctly:
You will see an error message and a red X next to the problematic record.

Review the record values carefully and correct any errors.
If needed, delete both CNAME records and re-add them using the values provided by Benchmark.
How to update your DKIM settings using Sendmarc
To update your DKIM record through Sendmarc, please refer to the Sendmarc DKIM Setup Documentation.
Benchmark Email’s Documentation
Benchmark’s official DKIM configuration guide can be found here.
Looking for SPF Settings?
Find out how to configure your Benchmark SPF settings here.


