FreshService DKIM Setup
DKIM (DomainKeys Identified Mail) is an email authentication protocol that uses cryptographic signatures to ensure emails have not been altered in transit and truly originate from your domain.
This guide outlines how to configure DKIM for FreshService, a cloud-based IT Help Desk and service management solution that simplifies IT operations.
FreshService DKIM Setup
- Login to your Freshdesk account as an Admin.
- Go to Admin > Support Channels > Email Settings > Advanced Settings> Configure DKIM.
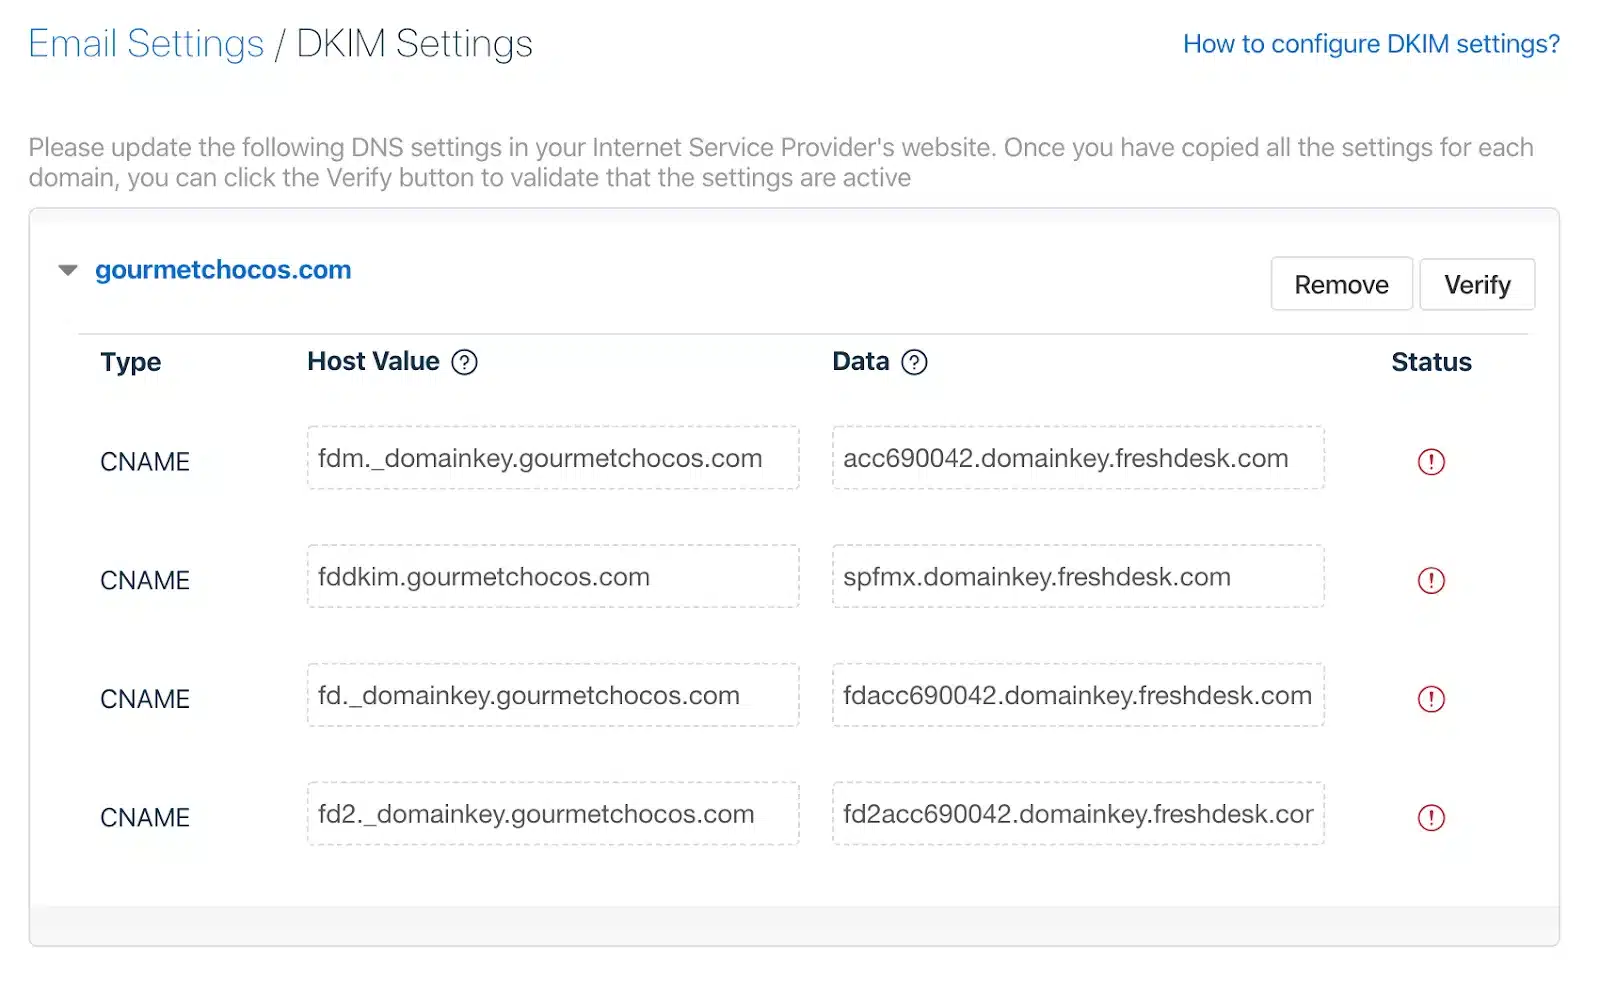
- Copy the system generated settings (4 CNAME records) to publish in your DNS server/domain provider’s account. This is a one-time configuration step per domain name.
 To update your DNS records with the Freshdesk domain key (In your domain registrar):
Note: If you’re using Sendmarc to manage your DKIM keys, you’ll need to add the 1st, 3rd and 4th keys to Sendmarc. The second will need to be added to your DNS as per the below.
- Login to your domain registrar’s control panel with the credentials used to register your domain name.
- To change the DNS records, locate and click on the option called Manage DNS, Name Server Management, DNS Management, or Advanced Settings.

- Look for an option to create a CNAME record.
- Add the values copied from your helpdesk into the new CNAME record.
- Once you have completed the setup, you need to verify it in Freshdesk. Under Admin → Email → Advanced Settings → Configure DKIM, expand the domain settings, and click on Verify to make sure that the DNS settings are published correctly.
How to update your DKIM settings using Sendmarc
To update your DKIM record through Sendmarc, please refer to the Sendmarc DKIM Setup Documentation.
FreshService’s Documentation
FreshService’s official DKIM configuration guide can be found here.
Looking for SPF Settings?
Find out how to configure your FreshService SPF settings here.
 To update your DNS records with the Freshdesk domain key (In your domain registrar):